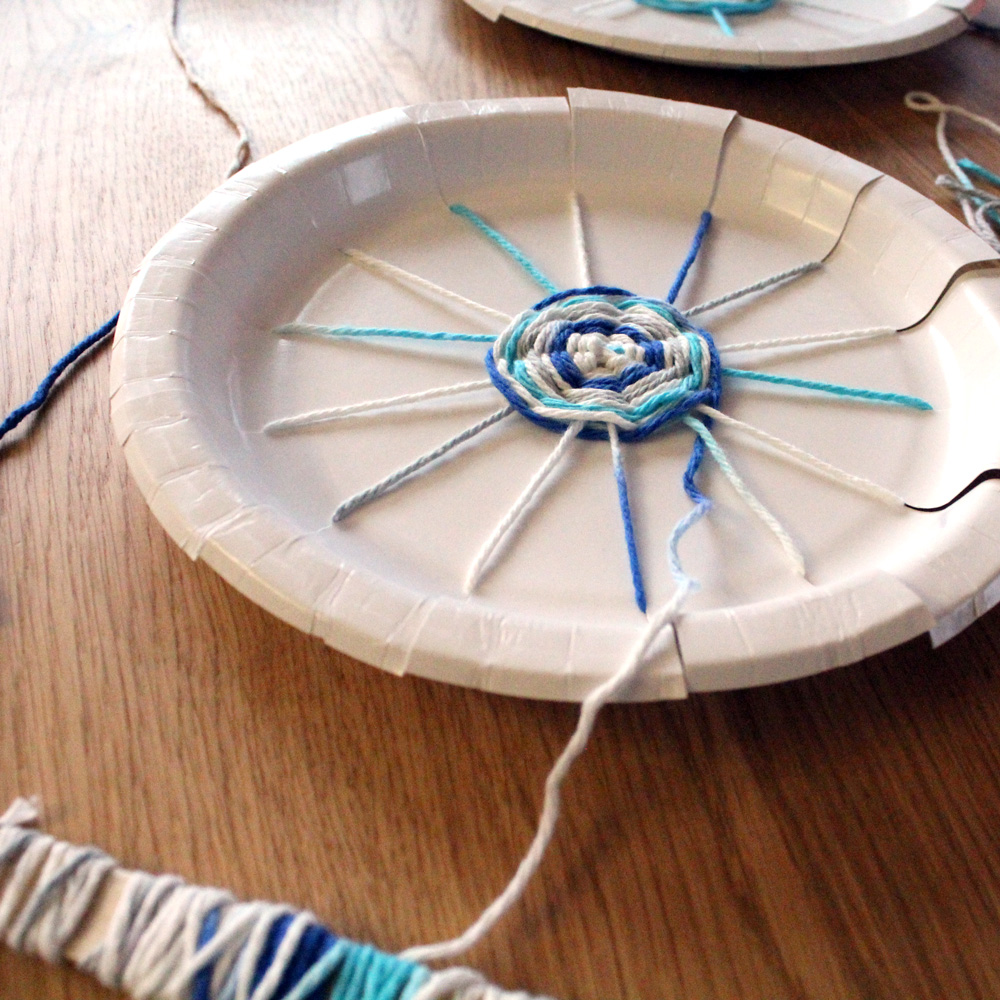
Paper plate weaving is a fun kids’ craft activity that’s perfect for practicing fine motor skills and keeping hands busy!
Disclosure: As an Amazon Associate and member of other affiliate programs we earn from qualifying purchases. Read more.
Paper plate weaving is fun for kids from preschool on up. It’s a fun way to practice fine motor skills and encourages patience since a large plate will take time to fill.
Toddlers and young kids will probably need quite a bit of adult help. You’ll need to set up the loom for your child, then guide them to get started on the weaving pattern. They may also not finish in one sitting, so don’t be surprised if your tot gets distracted after a few minutes. You can always pick it up and work on it for a few minutes each day.
Older kids from about age 8 and up will probably be able to do most steps on their own with a bit of guidance. This is also a fun adult craft, so try making one yourself alongside your kids!
While we included specific steps in our instructions below, this makes a great open-ended activity. Set up the paper plate weaving loom, then let kids explore weaving however they like! Don’t worry too much about creating a “finished” plate.

Paper plate weaving tips
- We recommend heavier white paper plates for this craft, but use what you already have at home. This is a fun way to use up leftover party plates when you only have a few.
- This is a great craft for using up scrap yarn! Mix and match colors or textures.
- When you get to the end of each piece of yarn and need to add more, you can just tie the tails together in a simple knot on the back of the paper plate. If you’re familiar with knitting and crochet, you may prefer to leave long tails of yarn to weave in at the end.
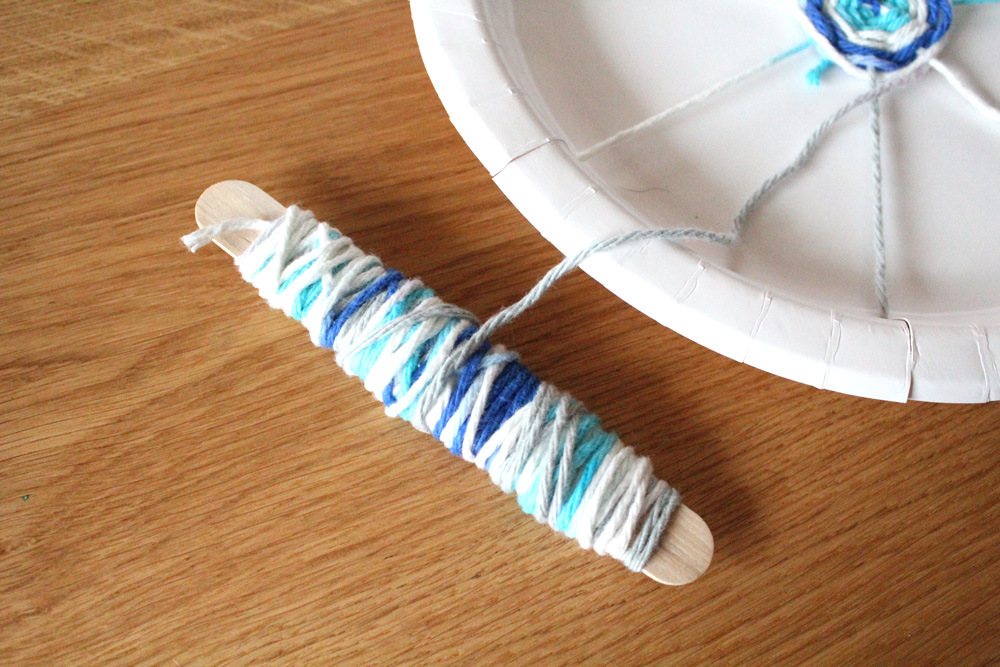
- To keep long yarn from tangling as you wrap, use a craft stick as a shuttle. Cut a length of yarn about 36 to 48 inches long and wrap it around the craft stick, then use that to weave the yarn.
Become a Happy Camper!
Sign up to receive our monthly email newsletter
and get a free printable 30 Day Reading Calendar!
How to do paper plate weaving
Adults may need to prep some of these steps for younger kids, but older ones may be able to do the cutting and yarn loom steps with supervision.
Supplies
Instructions
1. Divide the paper plate into sections.
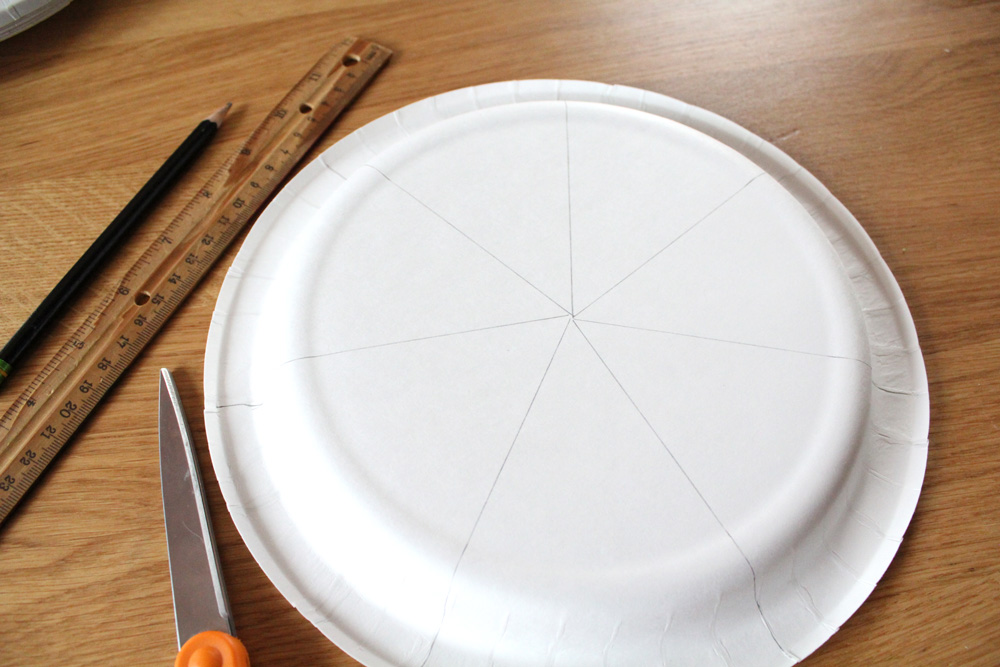
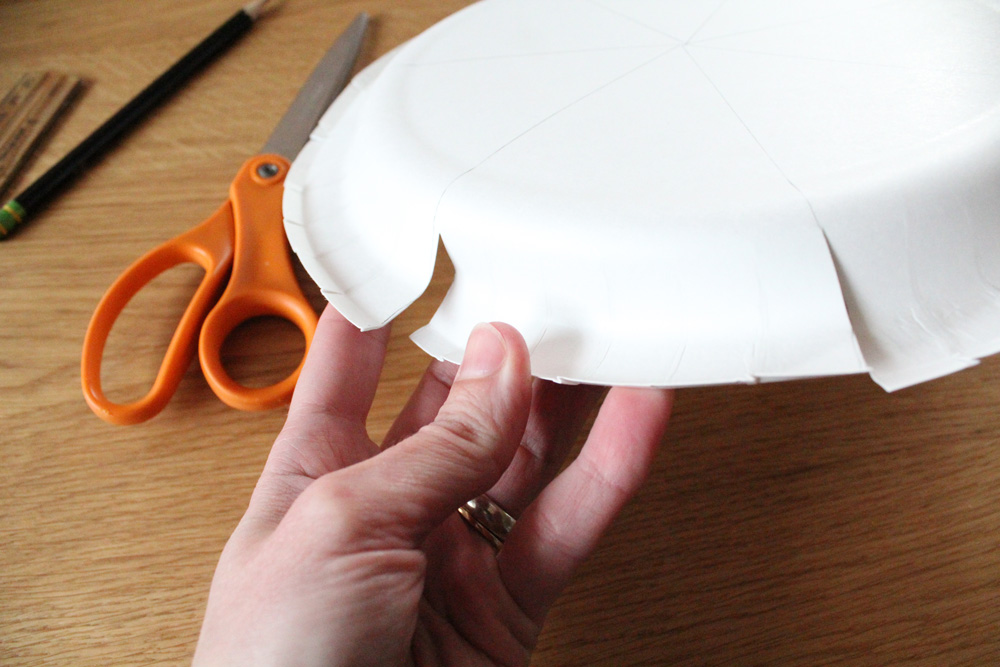
Start by using a pencil and ruler to divide the plate into sections. Young kids will do better with about 7 or 9, but older kids can do 11 or more. The important part is to make sure the number of sections you use is an odd number.
Draw straight lines on the back of the plate. If your plates have scallops, it’s easier to make them even. But it’s not essential, so don’t spend too much time drawing and redrawing the lines.
2. Cut slits into sections.
Next, cut down the lines you drew to make each section a flap. Cut the slit about 1 to 1.5 inches from each edge, leaving plenty of space in the center.
Our plates are 10 inches across so a 1.5-inch slit means the center circle measures 7 inches.
3. Create the yarn loom.
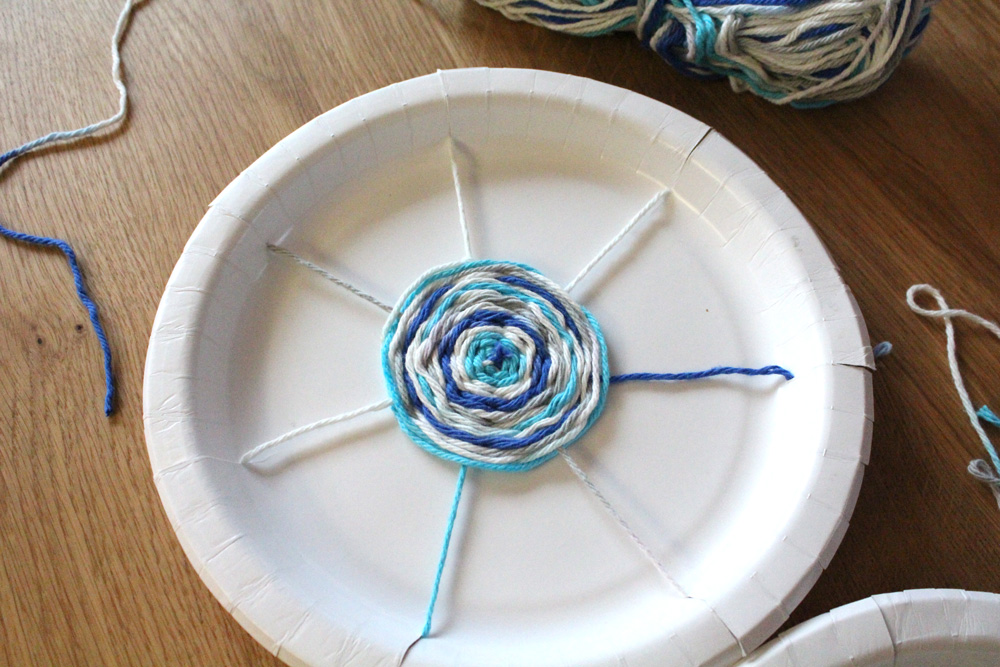
Take a piece of yarn several yards long and wrap it in a starburst pattern around the paper plate. Start at one of the slits and leave a long starting tail that can reach the center, then wrap across the front to the slit that is opposite.
(It won’t be directly across because we’ve got an odd number, so pick the one slightly to one side, clockwise.) Wrap around the back, then toward the next slit clockwise beside the original one.
Repeat the process until you’ve gone through each slit one time. After you bring the yarn through the last slit, pull it toward the center and tie it in a knot so that it pulls all the yarn triangles toward the center of the plate.
You can cut off this tail or leave it to weave in at the end; do the same on the back with your starting tail. This will keep the yarn loom in place.

4. Begin weaving the yarn.
To do paper plate weaving, begin in the center with a new piece of yarn and weave it over and under each strand of the yarn loom.
As you add rows, slide yarn toward the center as you go so that there aren’t any big gaps. This will help the finished piece stay flat.

5. Finish the weaving.
When you get to the end of the weaving, leave a few inches of yarn and weave it back into the other strands to hold it in place. You can also tie it in a small knot on the back of the plate for a more secure finish.
Printable instructions
Plan your summer with the DIY Summer Camp Planner!
Our step-by-step guide will help you organize a day, a week, or a whole summer of fun activities for your kids.

