
Learn how to make pony bead bracelets with elastic in a rainbow pattern that’s easy for beginners to follow.

Disclosure: As an Amazon Associate and member of other affiliate programs we earn from qualifying purchases. Read more.
Pony bead bracelets are a classic summer camp craft. The beads are large and easy to thread onto cord. They come in so many colors!
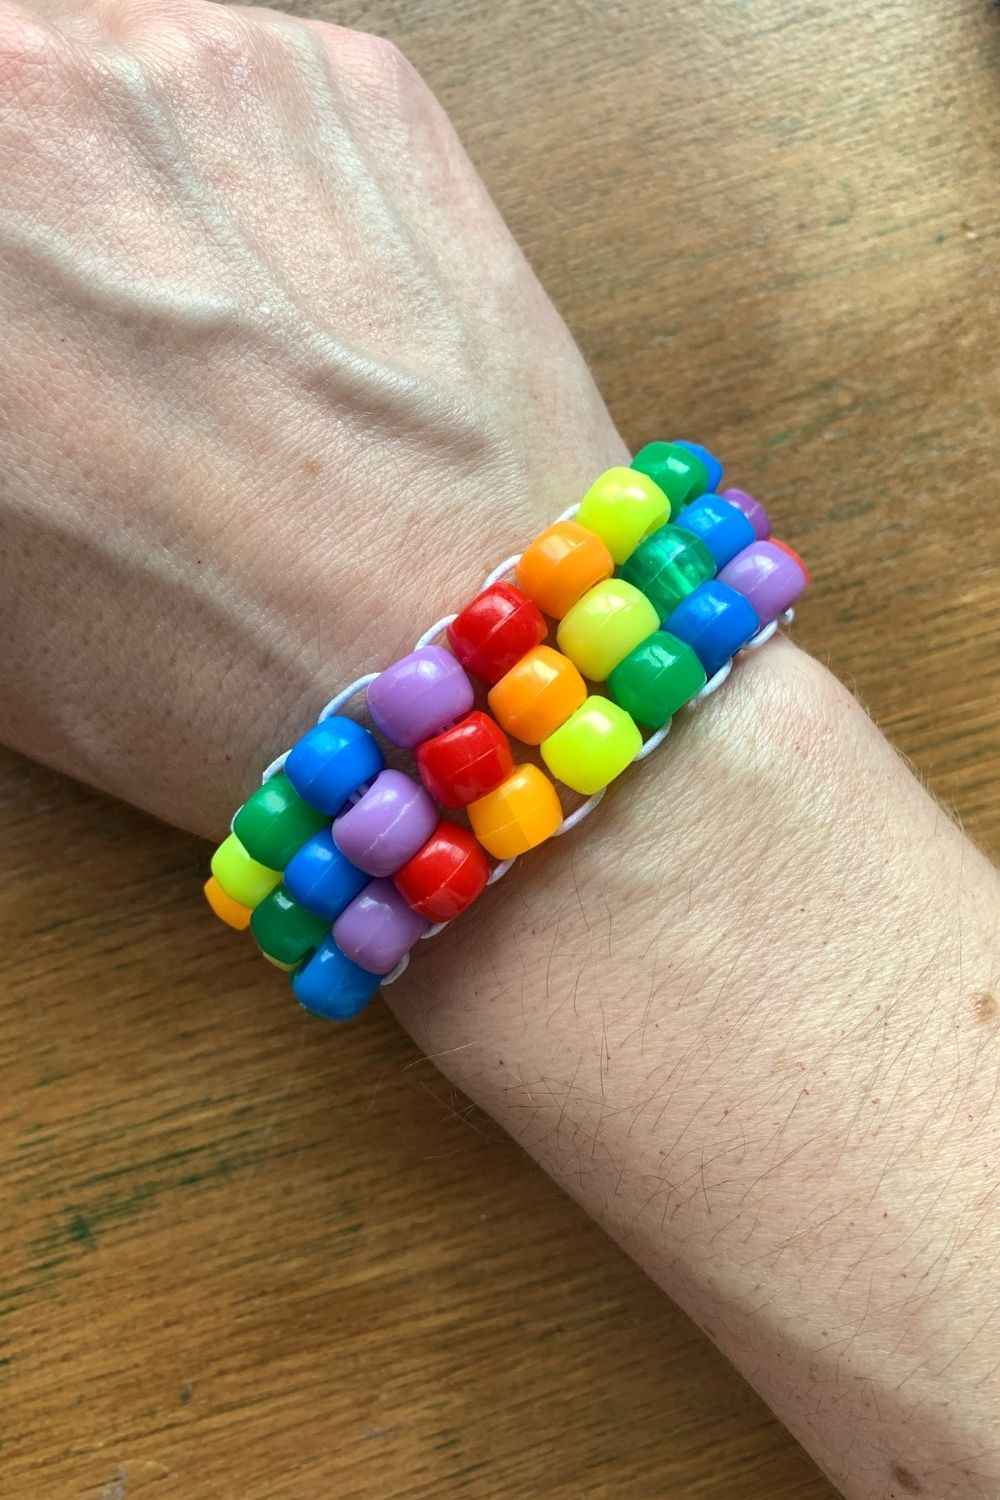
We made this one with a diagonal rainbow stripe. You could make the stripes vertical or change up the color scheme. Once you learn how to thread this bracelet style, you’ll want to make more in lots of different patterns.
Use up your extra beads in these fun bead craft ideas!
Become a Happy Camper!
Sign up to receive our monthly email newsletter
and get a free printable 30 Day Reading Calendar!
How to make pony bead bracelets
Supplies
- pony beads
- elastic bead cord
- scissors
Instructions
1. Cut the cord and plan the design.
Cut a length of elastic cord that is at least 36 inches long. You can trim the extra at the end, but it’s hard to add more.
Lay out the beads in the pattern you’re going to thread them in. This is really helpful so that you don’t skip a color and have to redo it.

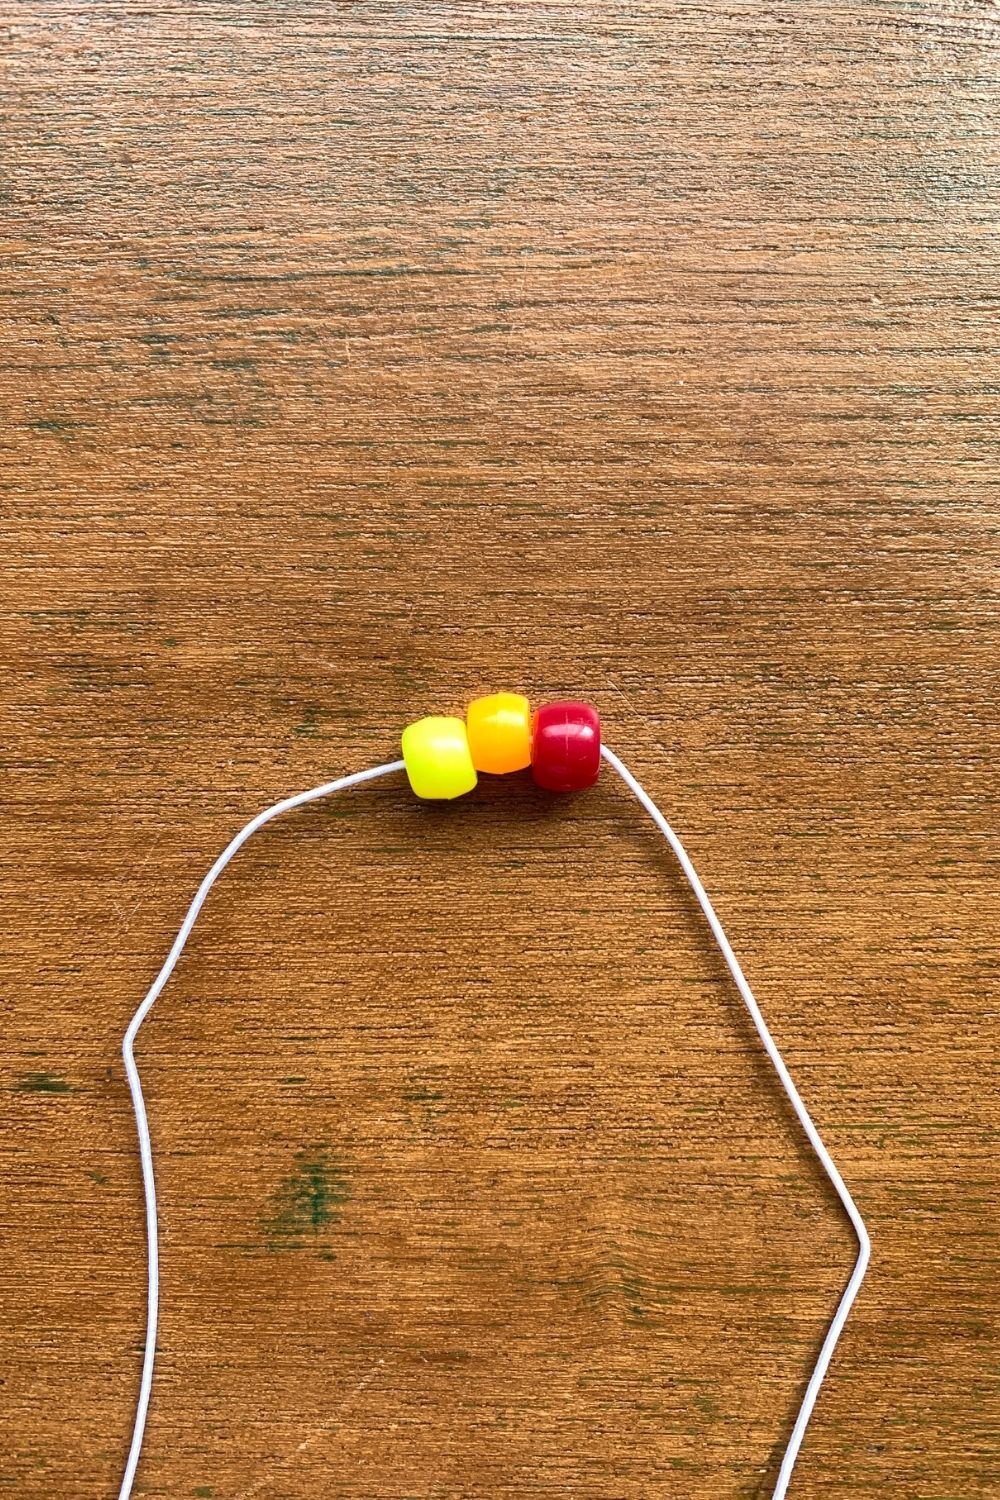
2. Thread the first beads.
Thread the first row of 3 beads onto the cord and slide them to the center.
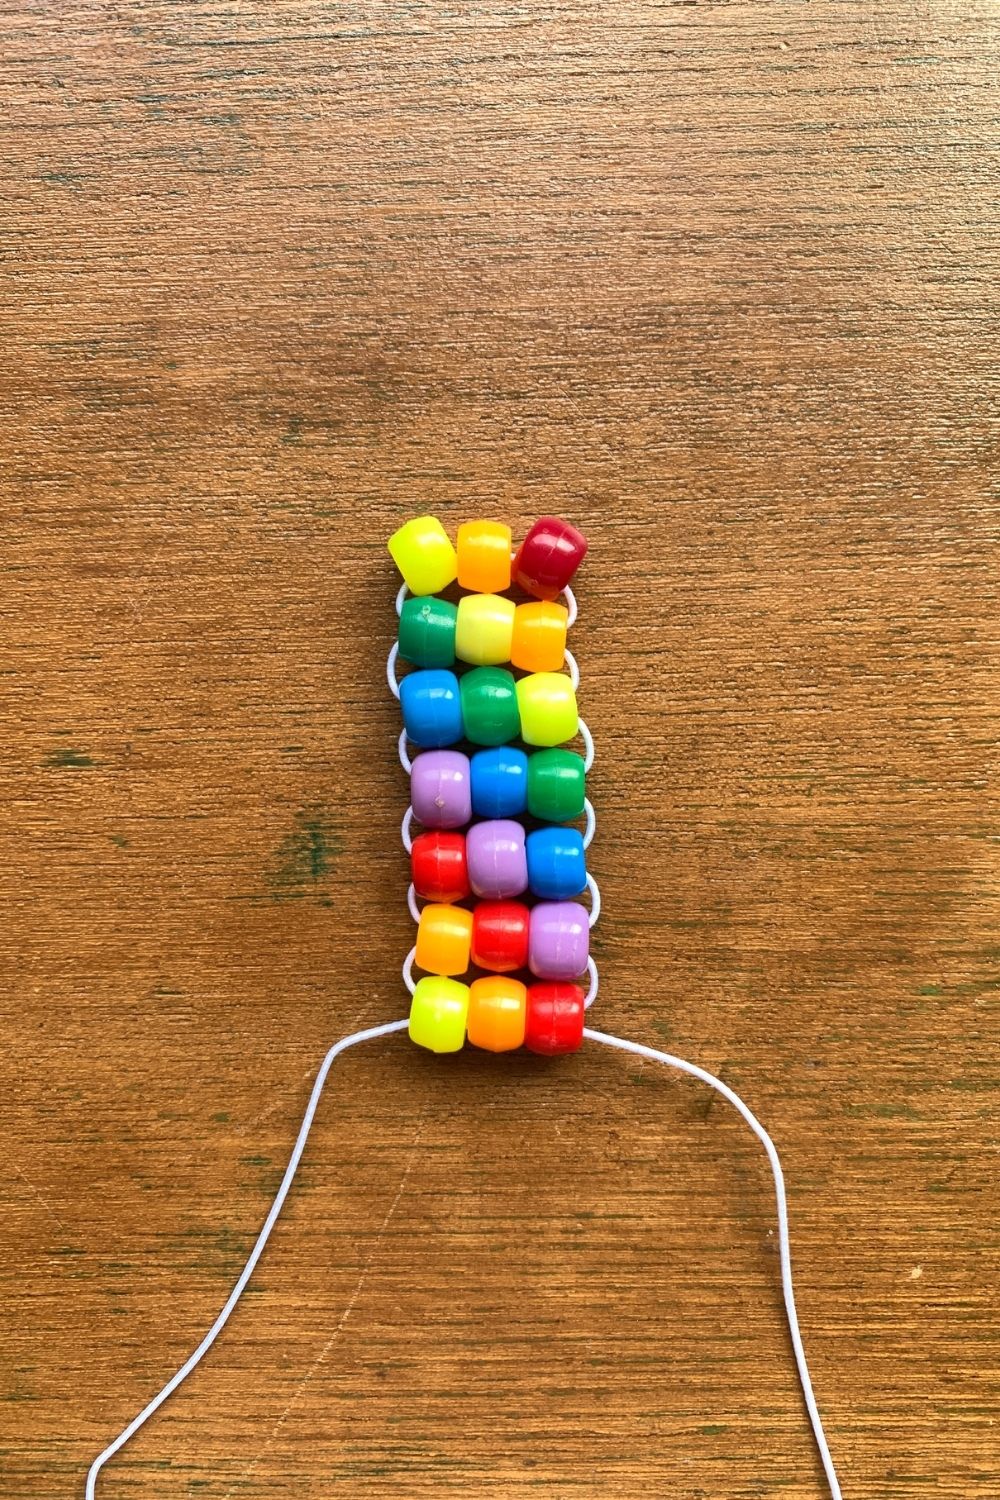
3. Add the second row.
To add the next row, bring both ends of the cord together and slide them through the beads from opposite ends. Tighten the elastic to pull the second row up next to the first one.


4. Repeat colors.
For each subsequent row, repeat the step of bringing both ends of the cord together and sliding them through the beads from opposite ends. Keep adding rows until the bracelet goes all the way around your wrist.
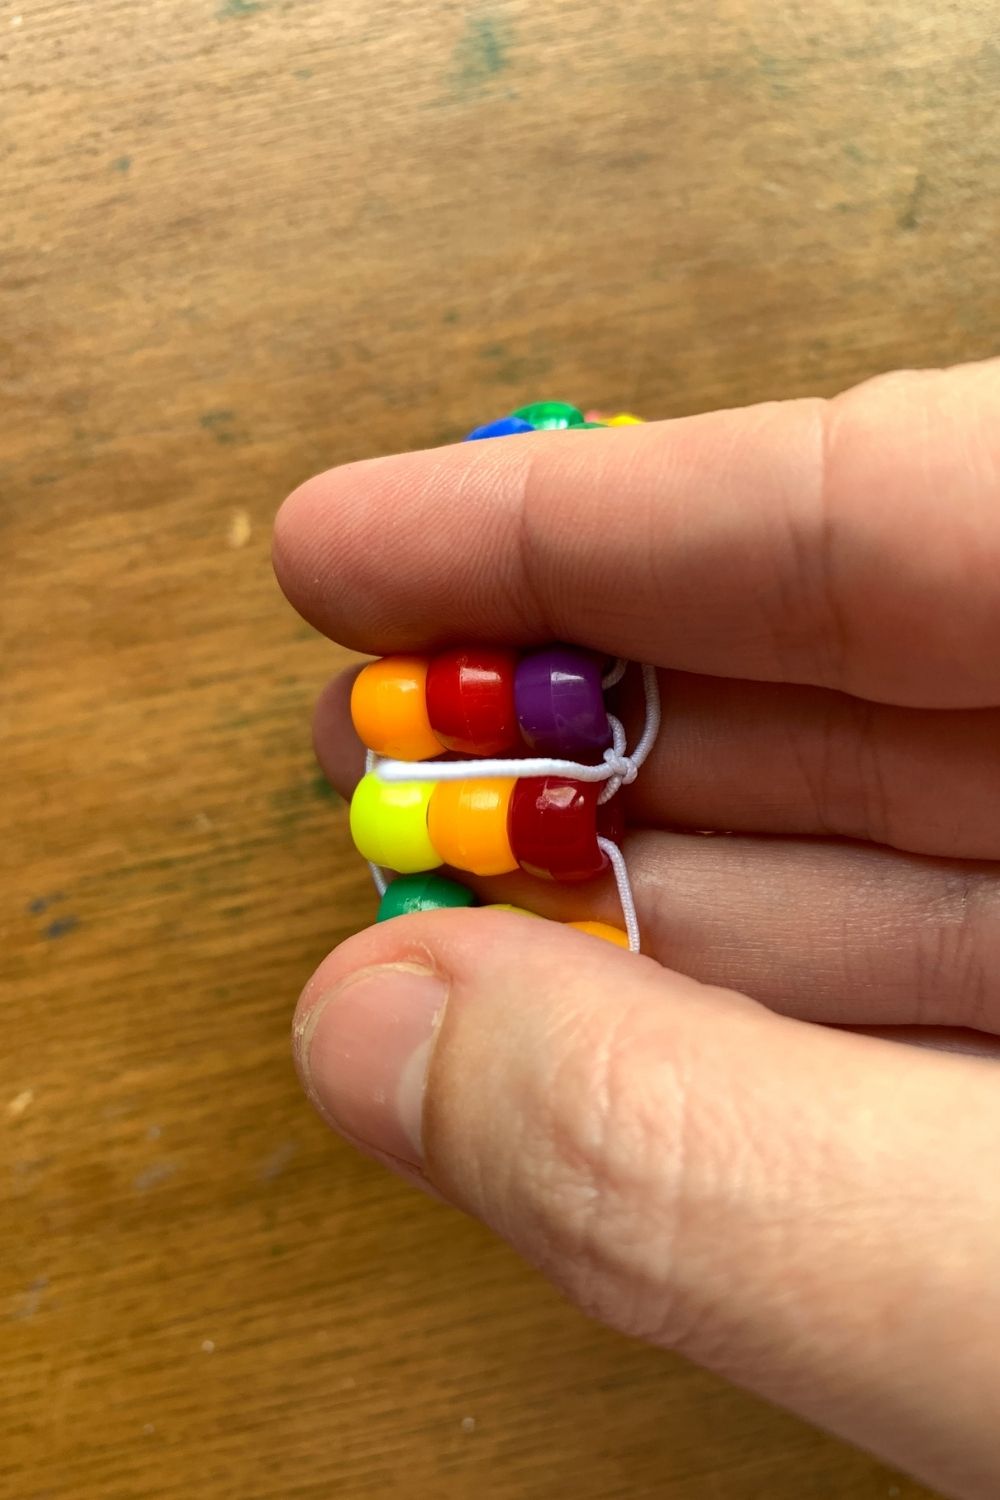
5. Tie the end to the beginning.
To finish the bracelet, tie the end to the first row. Line them up like the first row is another row you’re adding at the end. Slide one end of the elastic through and tie it to the other in a double knot. Trim the ends.
The elastic will stretch to slide the bracelet over your hand onto your wrist. These make fun friendship bracelets and are a great group activity for kids in a wide age range!
Printable instructions
Pony Bead Bracelets

Materials
- pony beads
- elastic bead cord
- scissors
Instructions
- Cut the cord and plan the design.
Cut a length of elastic cord that is at least 36 inches long. You can trim the extra at the end, but it's hard to add more. Lay out the beads in the pattern you're going to thread them in. This is really helpful so that you don't skip a color and have to redo it. - Thread the first beads.
Thread the first row of 3 beads onto the cord and slide them to the center. - Add the second row.
To add the next row, bring both ends of the cord together and slide them through the beads from opposite ends. Tighten the elastic to pull the second row up next to the first one. - Repeat colors.
For each subsequent row, repeat the step of bringing both ends of the cord together and sliding them through the beads from opposite ends. Keep adding rows until the bracelet goes all the way around your wrist. - Tie the end to the beginning.
To finish the bracelet, tie the end to the first row. Line them up like the first row is another row you're adding at the end. Slide one end of the elastic through and tie it to the other in a double knot. Trim the ends.
Plan your summer with the DIY Summer Camp Planner!

Our step-by-step guide will help you organize a day, a week, or a whole summer of fun activities for your kids.
