
Collect empty boxes and try some of these DIY cardboard box fort ideas with your kids for a fun open-ended construction project.
Disclosure: As an Amazon Associates participant we earn from qualifying purchases.
Summertime calls for adventures, and what better way to have an adventure at home than to build a cardboard box fort? Save your empty cardboard boxes to make a fun homemade fort from recyclable materials.
Older kids can build a fort with help from adults. If your kids are preschoolers, you’ll likely be doing most of the construction.
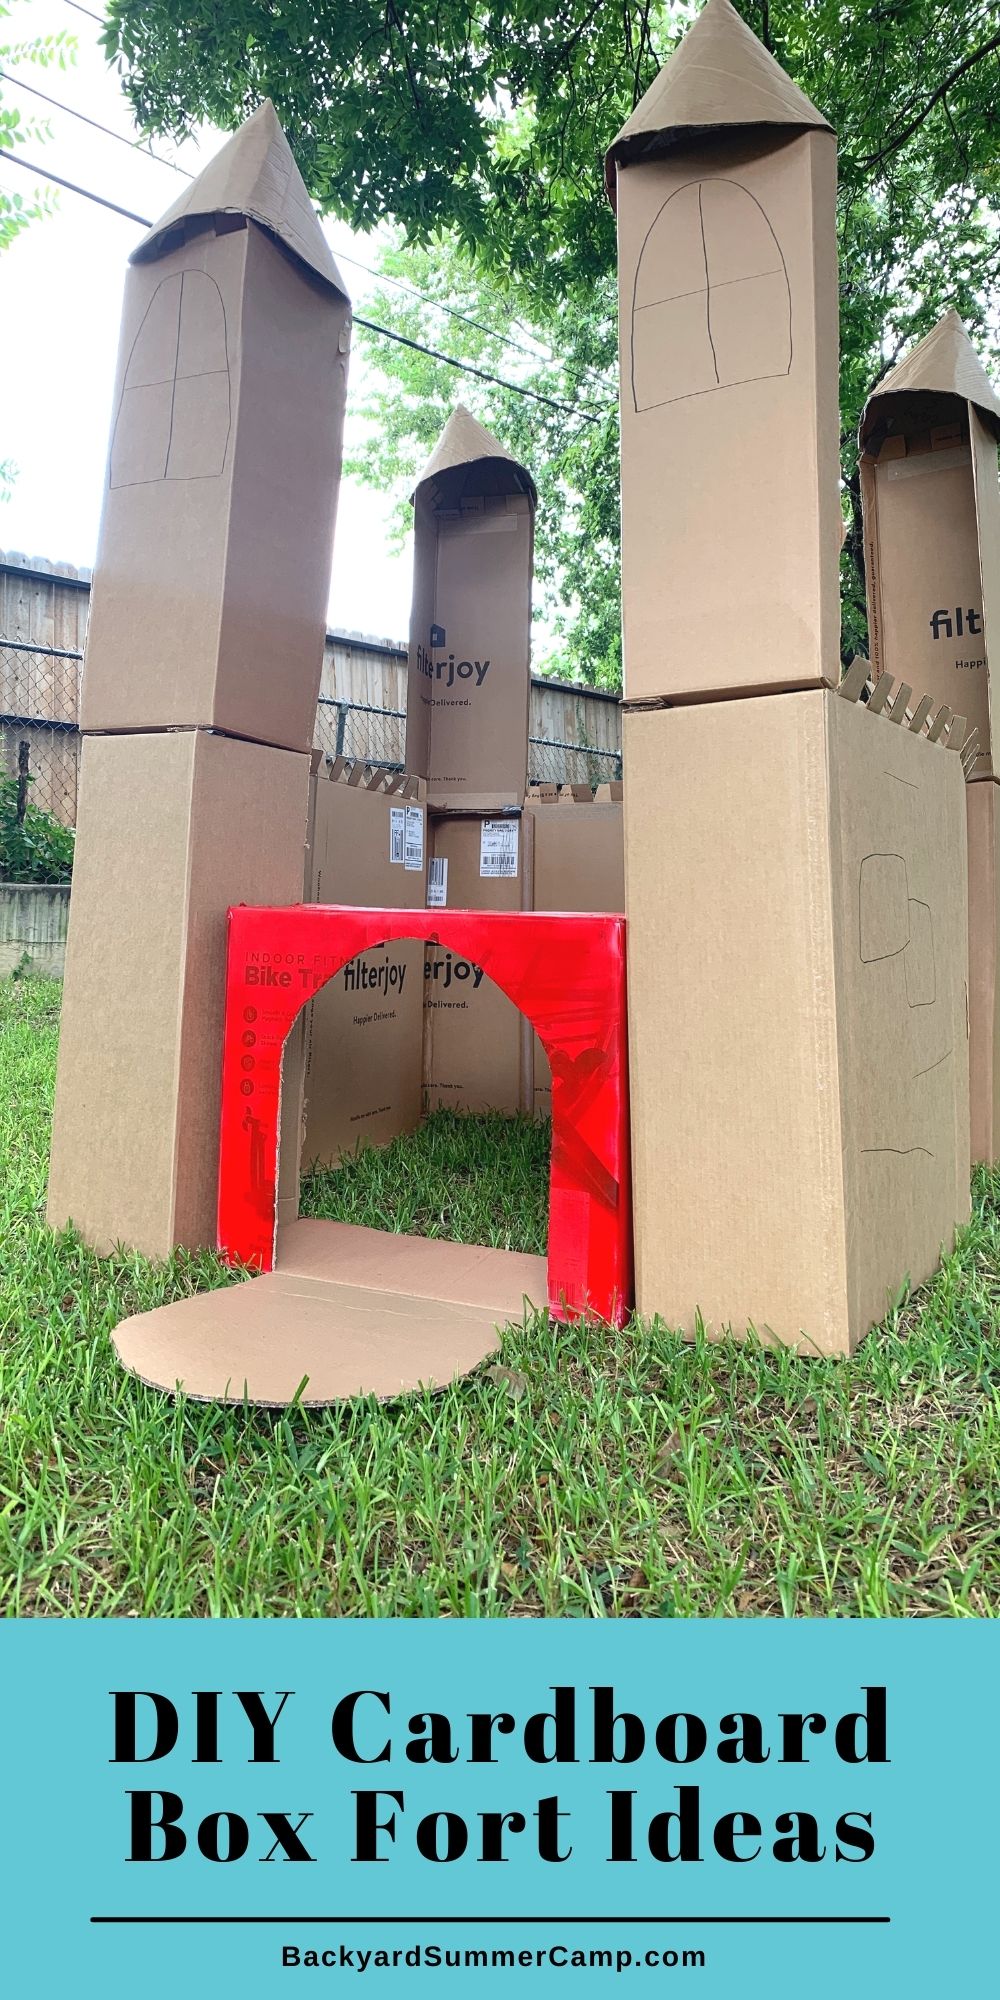
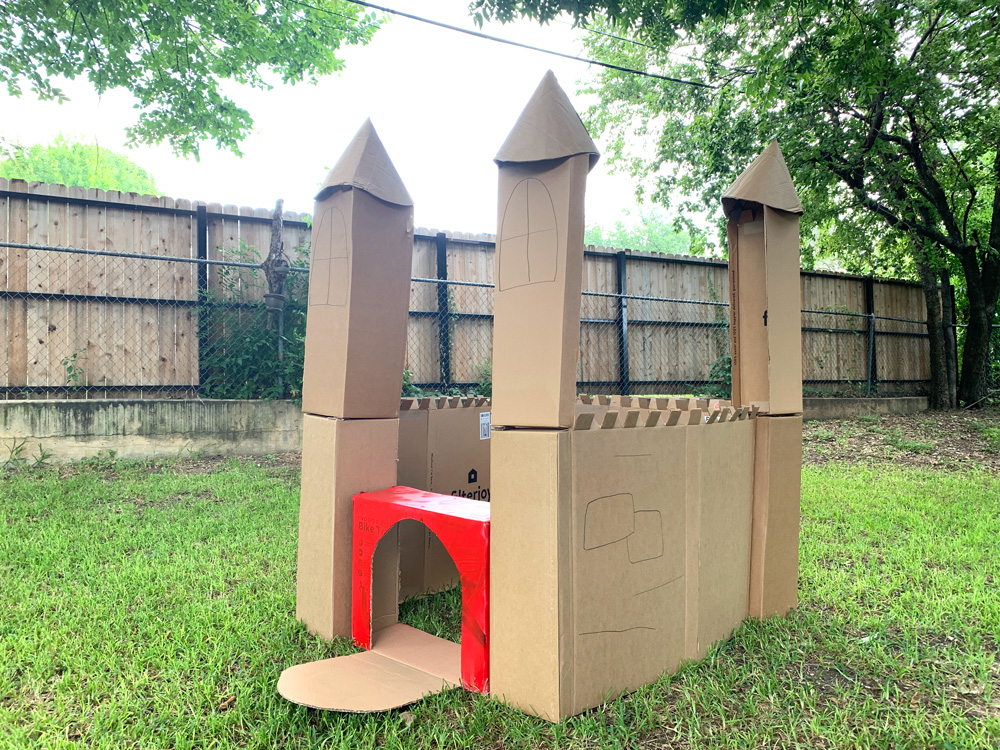
You can build indoors or outdoors, depending on how big you want your fort to be. We made ours modular so that we could build inside, then take it outside for play.
For even more fun, make a cardboard pirate ship to sail to your fort.
Fort vs. castle
Are you building a fort or a castle? They’re very similar and kind of serve the same purpose. According to Dictionary.com, a castle is a fortified home where a nobleman lives. A fort is a place surrounded by walls and guarded by an army.
For our purposes, we decided that a castle has a roof and a fort is just the walls. But of course, you can build your own cardboard fort to look however you like!
Become a Happy Camper!
Sign up to receive our monthly email newsletter
and get a free printable 30 Day Reading Calendar!
Fort building supplies
To build our DIY fort, we mostly saved empty cardboard boxes. Many of them are from an air filter subscription, but we also saved our biggest Amazon shipping boxes and anything else bigger than a cereal box.
Here are a few more household items that might make handy building materials:
- duct tape
- low-temp hot glue gun and glue sticks
- large adult-sized scissors (Kids’ school scissors just aren’t sturdy enough to cut through cardboard.)
- pencils
- ruler
- other large objects to trace (See tips below.)
- spray paint
- permanent markers
Tips for building a fort
- Save boxes as far in advance as you can. If you want to build a fort this weekend but don’t have many boxes, drive by a few local stores and check their recycling (usually near a dumpster behind the building). We’ve found that liquor stores and hair salons often have larger boxes that aren’t dirty. You might get lucky and be able to find big boxes at an appliance store.
- Look in kids’ books about castles and forts for inspiration. LEGO castles are also a great resource for building ideas.
- Design your fort before you start cutting. Sketch out a rough idea on paper. You don’t need to draw exactly what you’re planning to build or take measurements, but you want to make sure you have enough cardboard.
- Test which adhesives work best. Duct tape is really great for holding just about anything, but we found that hot glue held securely too. We tried a stapler, but the cardboard was too thick.
- A ruler is fine for drawing a straight line, but you might need other shapes too. To make our drawbridge, we traced a large mixing bowl to create the curved shapes.
- To make the turrets, we traced and cut a large circle, then cut it in half. We rolled each half-circle into a cone and duct taped the inside.

Cardboard building inspiration
Need some ideas? These elaborate forts and castles are all built from cardboard.
- A 2-story cardboard clubhose from Instructables
- This detailed, painted castle created by From Scratch With Maria
- For a small build, Ann Wood Handmade‘s cardboard castle
- This precious little box playhouse, via Life by Leanna
How to build a cardboard box fort
DIY Cardboard Box Fort

Materials
- duct tape
- low-temp hot glue gun
- adult-sized scissors
- pencil
- ruler
- spray paint
- permanent markers
Instructions
- Draw a rough sketch to plan out your fort to estimate how much cardboard you need.
- Cut cardboard pieces to be flat walls or box-shaped turrets.
- Trace a door or drawbridge onto a box and cut out.
- Assemble the fort by lining up the pieces and duct-taping them together.
- Decorate the fort using spray paint or permanent markers.

Every kid wants to build a fort. It’s the perfect mini hideout, reading nook, or secret home base. Constructing a cardboard box fort encourages kids to think creatively about the world around them and make a place that’s special.
Don’t worry too much about the details. Just give them the supplies and the space to build. You might be surprised at what they create.
Plan your summer with the DIY Summer Camp Planner!

Our step-by-step guide will help you organize a day, a week, or a whole summer of fun activities for your kids.
